Posts

Showing posts from September, 2023

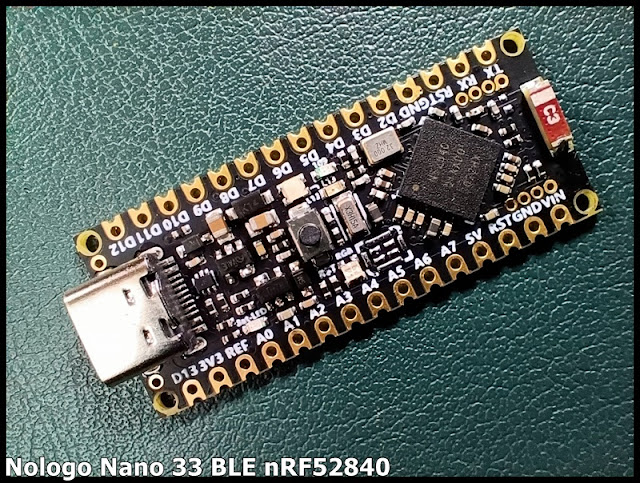
Install MicroPython on Nologo Nano 33 BLE nRF52840

Image
This video show steps to install MicroPython on Nologo Nano 33 BLE nRF52840 manually, basically follow the  MicroPython with Arduino page . Notice that to update bootloader and install the Soft Device, you have to make sure Arduino Mbed OS Nano Boards is installed in Board Manager. And select Board of Arduino Mbed OS Nano Boards > Arduino Nano 33 BLE. With MicroPython firmware flashed, you can download and install  Arduino Lab for MicroPython . Arduino Lab for MicroPython is a lightweight editor for MicroPython programs, supporting connection with a board, code upload, file transfer, interactive REPL shell. You can resume Arduino after MicroPython flashed.

Control 3.2" 240x320h IPS SPI Module ILI9341 with cap. touch FT6336U on Nologo Nano 33 BLE (Arduino Framework)

Image
In this post, to Control 3.2" 240x320h IPS SPI Module ILI9341 with cap. touch FT6336U with Nologo Nano 33 BLE in Arduino Framework, Adafruit_ILI9341 and Arduino-FT6336U libraries are need. - To install Adafruit_ILI9341, read the video in Raspberry Pi Pico (RP2040) + 3.2inch IPS SPI Module ILI9341 . - To download and install Arduino-FT6336U, read the video in Detect FT6336U Capacitive Touch Screen on Raspberry Pi Pico using Arduino-FT6336U library . Connection ILI9341 Module      Nano 33 BLE 1 VCC      3V3 2 GND             GND 3 LCD_CS      D5 4 LCD_RST      D6 5 LCD_RS      D7 6 SDI(MOSI)    D11 (SPI COPI) 7 SCK      D13 (SPI SCK) 8 LED      3V3 9 SDO(MISO)    D12 (SPI CIPO) 10 CTP_SCL      A5 (I2C SCL) 11 CTP_RST      D8 12 CTP_SDA      A4 (I2C SDA) 13 CTP_INT      D9 14 SD_CS      D10 Code nano33BLE_ILI9341_FT6336U.ino /* Exercidr run on Nano 33 BLE + 3.2 inch 320x240 IPS SPI Module ILI9341 with FT6336U Capacitive Touch Scr

my dev.board - Nologo UNO R4 WiFi

Image
my dev.board - Nologo UNO R4 WiFi Follow the  UNO R4 WiFi Getting Starte guide to install Board Package in Arduino IDE . First try Nologo UNO R4 WiFi and LED Matrix examples more: ~  Check and update UNO R4 WiFi firmware ~  List pins of Nologo UNO R4 WiFi ~  BLE examples run on Nano 33 BLE (as Peripheral) and Uno R4 WiFi (as Central) in Arduino framework using ArduinoBLE library ~  BLE communication between MicroPython aioble and ArduinoBLE ~  Display on SSD1306/SSD1315 OLED with Uno R4 WiFi & Nano 33 BLE using U8g2 library ~  Display on SSD1306/SSD1315 OLED with Uno R4 WiFi & Nano 33 BLE using Adafruit SSD1306 library ~  Flashing Heart on Uno R4 WiFi

Control Nologo Nano 33 BLE nRF52840 on-board LEDs

Image
Arduino code to control Nologo Nano 33 BLE nRF52840 on-board LEDs /* Exercise run on Nano 33 BLE nRF52840 to change LEDs. */ // the setup function runs once when you press reset or power the board void setup() { delay(1000); Serial.begin(9600); delay(500); Serial.print("LED_BUILTIN: "); Serial.println(LED_BUILTIN); Serial.print("LEDR: "); Serial.println(LEDR); Serial.print("LEDG: "); Serial.println(LEDG); Serial.print("LEDB: "); Serial.println(LEDB); // set LED pins to output mode pinMode(LEDR, OUTPUT); pinMode(LEDG, OUTPUT); pinMode(LEDB, OUTPUT); pinMode(LED_BUILTIN, OUTPUT); //turn off all LED digitalWrite(LED_BUILTIN, LOW); digitalWrite(LEDR, HIGH); digitalWrite(LEDG, HIGH); digitalWrite(LEDB, HIGH); } void changeRGB(){ digitalWrite(LEDR, HIGH); digitalWrite(LEDG, HIGH); digitalWrite(LEDB, HIGH); delay(1000); digitalWrite(LEDR, LOW); //LEDR On delay(500); digit

Draw Rotated Squares using Python with Turtle Graphics

Image
RotatedSquares.py , Python script to draw Rotated Squares using Turtle Graphics. (code copied from  https://deborahrfowler.com/MathForVSFX/RotatedSquares.html ) # Rotated Squares # # program to draw continually shrinking squares to give an interesting pattern # # Author: Deborah R Fowler # Date: Jan 11, 2020 # # input: none # output: interesting pattern # import turtle def drawSquare(t,size,angle): t.left(angle) halfsize = size * .5 t.pu() t.setpos(0,0) t.backward(halfsize) t.left(90) t.backward(halfsize) t.right(90) t.pd() for i in range(0,4): t.fd(size) t.left(90) def drawSquarePattern(t): t.color("black") drawSquare(t,700,0) for i in range(0,20): size = 700 * pow(1/1.2,i+1) drawSquare(t,size,12.5) t.ht() def main(): turtle.setup(750,750) turtle.title("Rotated Squares") t = turtle.Pen() t.width(2) t.speed(0) drawSquarePattern(t) turtle

Python script with tkinter GUI to capture images from Raspberry Pi Camera Module 3

Image
Python script with tkinter GUI run on Raspberry Pi 4B/8G running 32-bit Raspberry Pi OS (bullseye), to capture images from Raspberry Pi Camera Module 3 . cam_tkinter_capture.py from tkinter import * from tkinter import messagebox from picamera2 import Picamera2, Preview from libcamera import controls import time import sys picam2 = Picamera2() camera_config = picam2.create_preview_configuration() picam2.configure(camera_config) picam2.start_preview(Preview.QTGL) picam2.set_controls({"AfMode": controls.AfModeEnum.Continuous}) picam2.start() root = Tk() root.title(sys.argv[0]) root.geometry("550x450") # center on screen root.eval('tk::PlaceWindow . center') labelframe = LabelFrame(root, text="Click button to capture image") labelframe.pack(fill = "both", expand = "yes") def btnCallBack(): print("- Capture image -") timeStamp = time.strftime("%Y%m%d-%H%M%S") targetPath="/home/pi/Deskt

Raspberry Pi Camera Module 3

Image
My  Raspberry Pi Camera Module 3 ~  Raspberry Pi Document > Camera Module Exercises using Raspberry Pi Camera Module 3: ~  Python script with tkinter GUI to capture images from Raspberry Pi Camera Module 3 ~  Python script with tkinter GUI to capture images from Raspberry Pi Camera Module 3, with Toggling AF mode function . Exercises run on Raspberry Pi 5 running 64-bit Raspberry Pi OS (bookworm) with Camera Module 3: ~  Using the Raspberry Pi Camera in Python3/PyQt5 applications using picamera2 lib

my dev.board - Nologo Nano 33 BLE nRF52840

Image
Nologo Nano 33 BLE nRF52840 Pinout: ref: ~ Arduino Nano 33 BLE Document Install and first try Nologo Nano 33 BLE nRF52840 in Arduino IDE 2 To program Nologo Nano 33 BLE nRF52840 in Arduino framework, makesure Arduino Mbed OS Nano Boards is installed in Board Manager. And select Board of Arduino Mbed OS Nano Boards > Arduino Nano 33 BLE. Exercise: Arduino Framework: ~  Control Nologo Nano 33 BLE nRF52840 on-board LEDs ~  Control 3.2" 240x320h IPS SPI Module ILI9341 with cap. touch FT6336U on Nologo Nano 33 BLE (Arduino Framework) ~  BLE examples run on Nano 33 BLE (as Peripheral) and Uno R4 WiFi (as Central) ~  BLE communication between MicroPython aioble and ArduinoBLE ~  Display on SSD1306/SSD1315 OLED with Uno R4 WiFi & Nano 33 BLE using U8g2 library ~  Display on SSD1306/SSD1315 OLED with Uno R4 WiFi & Nano 33 BLE using Adafruit SSD1306 library ~  Display on 320x480 ILI9488 SPI TFT with Nano 33 BLE nRF52840 using Ardui

Detect FT6336U Capacitive Touch Screen on Raspberry Pi Pico using Arduino-FT6336U library.

Image
This video show reading FT6336U Capacitive Touch Screen using Arduino-FT6336U library. (Run on Raspberry Pi Pico / 3.2" 240x320 IPS SPI ILI9341 with Capacitive Touch ) For the display part, refer to the post  Raspberry Pi Pico (RP2040) + 3.2inch IPS SPI Module ILI9341 (Arduino Framework using Adafruit_ILI9341 library) . To install  Arduino-FT6336U for touch part, visit  https://github.com/aselectroworks/Arduino-FT6336U , download code in ZIP form. For steps, read this video. Connection ILI9341 Module    Raspberry Pi Pico 1 VCC           3V3 2 GND    GND 3 LCD_CS    GP17 4 LCD_RST    GP21 5 LCD_RS    GP20 6 SDI(MOSI)    GP19 7 SCK    GP18 8 LED    3V3 9 SDO(MISO)    GP16 10 CTP_SCL GP5 11 CTP_RST GP3 12 CTP_SDA GP4 13 CTP_INT GP2 14 SD_CS GP15 Exercise code pico_ReadTouchParam_FT6336U.ino, modified from ReadTouchParam to display touch event. /* Exercise to read FT6336U Capacitive Touch Screen. Run on Raspberry Pi Pico

Enable Host Webcam in VirtualBox Guest OS

Image
Enable Host Webcam in VirtualBox Guest OS (Tested on VirtualBox 7/Windows 11) Oracle VM VirtualBox includes a feature called webcam passthrough, which enables a guest to use a host webcam. ref: https://docs.oracle.com/en/virtualization/virtualbox/7.0/user/AdvancedTopics.html#webcam-passthrough To use Webcam Passthrough, Oracle VM VirtualBox Extension Pack have to be installed. Visit https://www.virtualbox.org/wiki/Downloads Install Extension Pack in VirtualBox: > File > Tools > Extension Pack Manager Click on Install button, locate the downloaded Extension Pack file. With Extension Pack installed, Webcams is listed under Devices of VirtualBox Menu.