Posts

Showing posts from April, 2023

Update/Restore micro:bit firmware and reload Out of box .hex

Image
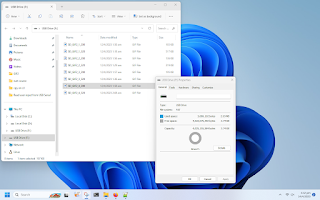
To update/restore micro:bit firmware Visit: https://microbit.org/get-started/user-guide/overview/ , click on Firmware. Scroll down to download firmware that match your board and version. Flash firmware:- - Hold the reset button and plug the USB lead into the micro:bit. - A drive appear in file manager called MAINTENANCE (instead of MICROBIT). - Drag and drop the downloaded firmware (.hex) onto the MAINTENANCE drive. When the upgrade is completed, the micro:bit will reset, ejecting itself from the computer and re-appear in normal MICROBIT drive mode. Reload Out of box .hex Visit https://microbit.org/get-started/user-guide/overview/ , click on Out of box experience. Download the out of box .hex file Drag and drop the downloaded out of box .hex file onto the MICROBIT drive. After out of box .hex file reloaded, MICROBIT drive will re-appear.

my dev.board - micro:bit v2.21

Image
my dev.board - micro:bit v2.21 ~ micro:bit official user guide micro:bit exercises: ~  Rust-embedded on Micro:bit ~  Update/Restore micro:bit firmware

Install Rust-embedded on Micro:bit, run on Linux Mint 21.1.

Image
Install Rust-embedded on Micro:bit, run on Linux Mint 21.1 (over Windows 11/VirtualBox). This post shows how I start in rust-embedded on my micro:bit . Basically, this post follow the on-line book Discovery (micro:bit version) to introduce you to micro:bit and Rust-embedded. Setting up a development environment:- Install rustc & Cargo: Install rustup by following the instructions at https://rustup.rs $ curl --proto '=https' --tlsv1.2 -sSf https://sh.rustup.rs | sh Install cargo-binutils: $ rustup component add llvm-tools-preview $ cargo install cargo-binutils --vers 0.3.3 $ cargo size --version Install prerequisites for cargo-embed: $ sudo apt install -y pkg-config libusb-1.0-0-dev libftdi1-dev libudev-dev Install cargo-embed: $ cargo install cargo-embed --vers 0.11.0 but fail: failed to select a version for requirement 'cargo_toml = "^0.9.0"'... Then I install the latest 0.18.0 instead of 0.11.0. The

Add USB Filter in VirtualBox to make USB device auto attach

Image
With USB device attached, in VitualBox Manager: > Setting > Select USB tab > Click "+", to "Adds new USB filter..." > Select the USB device to add it to USB Device Filters > OK

my dev.board: Sipeed Maix Bit (RISC-V K210)

Image
Maix Bit product page ~ https://wiki.sipeed.com/hardware/zh/maix/maixpy_develop_kit_board/maix_bit.html Update MaixPy firmware and install MaixPy IDE on Windows 11 MaixPy MaixPy is a MicroPython for K210 RISC-V https://github.com/sipeed/MaixPy Download Tool kflash_gui is a cross platform GUI wrapper for kflash.py (download/burn tool for k210) https://github.com/sipeed/kflash_gui Download bin file (kflash_gui_v*.*) here https://github.com/sipeed/kflash_gui/releases MaixPy Firmware Download latest MaixPy firmware https://dl.sipeed.com/MAIX/MaixPy/release/master/ MaixPy IDE Download the installation package: https://dl.sipeed.com/MAIX/MaixPy/ide/

XIAO nRF52840/CircuitPython implement BLE UART Service, linked with XIAO ESP32C3/Arduino BLE UART Client.

Image
  The BLE GATT Nordic UART Service (NUS) is a custom service that receives and writes data and serves as a bridge to the UART interface. ref: https://developer.nordicsemi.com/nRF_Connect_SDK/doc/2.3.0/nrf/libraries/bluetooth_services/services/nus.html In this exercise, XIAO nRF52840 Sense running CircuitPython, implement BLE UART Service. cpynRF_ble.py """ Circuitpython BLE exercise Run on XIAO nRF52840 Sense/CircuitPython 8.1.0-beta.1 Provide an echo service over BLE UART. Act as BLE UART server, receive from BLE UART and echo back ref: https://learn.adafruit.com/circuitpython-ble-libraries-on-any-computer/ble-uart-example """ import os, sys import time import board, busio from adafruit_ble import BLERadio from adafruit_ble.advertising.standard import ProvideServicesAdvertisement from adafruit_ble.services.nordic import UARTService #------------------------ print("========================================") print(

Test 1.44" 128x128 ST7735 SPI TFTs, on XIAO nRF52840 Sense/CicuitPython

Image
These are two models of ST7735 SPI TFT LCD : - marked "haoda-SPI-144" green pcb - marked "KMR1441_SPI V2" red pcb both are 1.44 inch 128x128, but in difference setting. It's a exercise run on  XIAO nRF52840 Sense with CircuitPython 8.1.0-beta.1, to display on them using adafruit_st7735 and adafruit_st7735r libraries with parameters setting. remark: I bought "KMR1441_SPI V2" a few years ago. This exercise just for functional testing for programming, not for quality comparison. Libraries needed - adafruit_display_shapes folder - adafruit_st7735.mpy - adafruit_st7735r.mpy Connection #connection #TFT_GND GND #TFT_VCC 3V3 TFT_SCL = board.SCK #D8 TFT_SDA = board.MOSI #D10 TFT_RES = board.D3 TFT_DC = board.D4 TFT_CS = board.D5 #TFT_BL 3V3 Both LCDs connected in parallel. Exercise code cpynRF_st7735.py """ Test on two 1.44" 128x128 ST7735 SPI IFI - "haoda-SPI-144" green pcb - &

my display modules: 1.44" 128x128 ST7735 SPI TFT

Image
These are two models of TFT LCDs, both are 1.44 inch 128x128. - marked "haoda-SPI-144" green pcb - marked "KMR1441_SPI V2" red pcb Both are 1.44 inch 128x128, but in difference setting. Check my test on XIAO nRF52840 Sense/CicuitPython .

CircuitPython to list pin map

Image
Many pins on CircuitPython compatible microcontroller boards have multiple names, however, typically, there's only one name labeled on the physical board. So how do you find out what the other available pin names are? Simple, with the following script! Each line printed out to the serial console contains the set of names for a particular pin. ref:   CircuitPython Essentials > CircuitPython Pins and Modules > What Are All the Available Names? # SPDX-FileCopyrightText: 2021 Kattni Rembor for Adafruit Industries # # SPDX-License-Identifier: MIT """CircuitPython Essentials Pin Map Script""" import microcontroller import board board_pins = [] for pin in dir(microcontroller.pin): if isinstance(getattr(microcontroller.pin, pin), microcontroller.Pin): pins = [] for alias in dir(board): if getattr(board, alias) is getattr(microcontroller.pin, pin): pins.append("board.{}".fo

Download code to CH582F (RISC-V) using MounRiver Studio v1.84/WCHISPStudio V3.40, on Windows 11.

Image
For  WeAct Studio CH582F (RISC-V) BLE5.3 Core Board : There are two approach to download code to CH582F i - ISP (In-System Programmer) : via onboard USB using WCHISPStudio. CH582F have to be set in Boot mode (press & hold BOOT button, then connect USB to onboard USB port). ii - With WCHlink Debugger using MounRiver Studio Flash funtion directly. Two-line debug interface have to be enable in-advance. In my test: With MounRiver Studio v1.84 installed on Windows 11 , WCHISPStudio V3.40, and USB driver installed also. That means I have no need to download and install WCHISPStudio and USB driver separately. Connect WeAct WCHlink to CH582F as: WCHlink    CH582F 3V3        3V3 DIO        B14 CLK        B15 GND        GND Github WeActStudio/WeActStudio.WCH-BLE-Core https://github.com/WeActStudio/WeActStudio.WCH-BLE-Core

Install Linux Lite on VirtualBox/Windows 11

Image
This video show steps to install Linux Lite 6.4 on VirtualBox 7/Windows 11 Download Linux Lite 6.4 64bit iso: https://www.linuxliteos.com/download.php

my dev.board - Twen-CH32V003 32 bit RISC-V development board

Image
Twen-CH32V003 32 bit RISC-V development board

my dev.board - Twen32-003 32 bit ARM Cortex-M0+ development board

Image
Twen32-003 32 bit ARM Cortex-M0+ development board

CH32V003 UART example

Image
It's a UART example run on Muse Lab nanoCH32V003 . Actually, it is the default Hello World generated by MounStudio Studio. It demonstrates that USART1 receives the data sent by CH341 and inverts it and sends it (baud rate 115200). This video also show the  Muse Lab WCH-LinkE act as USB to TTL serial adapter to communicate with CH32V003 via UART using RuTTY . Connection The modified main.c is listed here for reference. /********************************** (C) COPYRIGHT ******************************* * File Name : main.c * Author : WCH * Version : V1.0.0 * Date : 2022/08/08 * Description : Main program body. ********************************************************************************* * Copyright (c) 2021 Nanjing Qinheng Microelectronics Co., Ltd. * Attention: This software (modified or not) and binary are used for * microcontroller manufactured by Nanjing Qinheng Microelectronics. **************************

PuTTY on Windows 11

Image
PuTTY is a communications tool for running interactive command-line sessions on other computers, usually via the SSH protocol. It can also communicate over a serial port, or speak various legacy Internet protocols such as Telnet. Putty can be installed using Microsoft Store: PuTTY send CR with LF In my testing PuTTY Release 0.78 on Windows 11, when ENTER pressed, CR send but no LF. Such that cursor go back to beginning of the same line. To fix it: Click on the PuTTY icon on top-left corner > Change Settings... Select Terminal enable both: - Implicit CR in every LF - Implicit LF in every CR then Apply

my dev.board - Wio Terminal

Image
 Wio Terminal: Pinout: ref: ~  Get Started with Wio Terminal ~ Update Wireless Core Firmware and Install Libraries ~ To installing CircuitPython on Wio Terminal Related: ~  RP2040/CircuitPython 8.1.0-beta.1 - Play animated GIF stored in SD Card, updated with exercise code run on Wio Terminal

Windows 11 trick - change Microsoft Store App install location

Image
Change Microsoft Store App install location Settings > Storage > Advanced storage Settings > Where new content is saved > Change where your content are saved, then click on Apply. Change location of installed Microsoft Store App Settings > Apps > Installed apps > find the app and move

RP2040/CircuitPython 8.1.0-beta.1 - Play animated GIF stored in SD Card

Image
Previous post my exercise of playing animated GIF (stored in CircuitPython device) on 8 bit parallel bus ILI9341 . This exercise load the animated GIFs from SD Card. updated@2023-04-15: Exercise code for Wio Terminal added, scroll down to find it. Prepare SD Card A 4G SD Card is formatted as FAT to store GIFs. Connection It's a SD Card on my  2.8 inch 320x240 ili9341 TFT with 8/16BIT parallel interface . To interface, extra pins for SD Card are needed.      Connection between RP2040 and      2.8" 320x240 ili9341 TFT in 8-bit parallel interface: RP2040 GPIO      |           |      V V +------------+ 2 | CLK T_CS | | F_CS PEN | 3 | MOSI MISO |  4 | NC GND | GND      GND | GND VDD | 3V3      3V3 | VDD BL | 3V3 5 | SDCS DB15 | 17      16 | DB14 DB13 | 15      14 | DB12 DB11 | 13      12      | DB10 DB9 | 11      10 | DB8 DB7 | | DB6 DB5 | | DB4 DB3 | | DB2 DB1

CircuitPython - Read user input from USB serial non-blocking

Image
In CircuitPython, we can get user input using input(). But it's a blocking function, that means it will not return until user input something. It's useful tricks to read user input non-blocking,  circuitpython-tricks . Here are my modified exercises running on  ESP32-S3-DevKitC-1 flashed CircuitPython 8.0.5. In my exercises, onboard RGB neopixel change color to show it's non-blocking. Library neopixel.mpy is needed in my exercises, read  ESP32-S3-DevKitC-1/CircuitPython to drive NeoPixel . non-blocking_mostly.py  Read user input from USB Serial, non-blocking (mostly) In my test, supervisor.runtime.serial_bytes_available will not be cleared once user input; become blocking. """ Read user input from USB Serial, non-blocking (mostly) https://github.com/todbot/circuitpython-tricks#read-user-input-from-usb-serial-non-blocking-mostly """ import time import supervisor import board import neopixel # Create the NeoPixel object pixel = neopixel

Flash CircuitPython firmware to ESP32-S3/C3 using esptool on Windows 11

Image
This video show steps to flash CircuitPython 8.0.5 to  Espressif ESP32-S3-DevKitC-1 , using esptool on Windows 11. Software preparation for Windows 11: - Install Python (and pip) - Install esptool - To recognize ESP32-S3-DevKitC-1 UART port, install CP210x USB driver Download CircuitPython firmware: - visit https://circuitpython.org/downloads - search ESP32-S3-DevKitC-1-N8R8, DOWNLOAD .BIN NOW To flash firmware to ESP32-S3-DevKitC-1-N8R8: - connect USB to the port marked "UART" To erase flash: esptool.py --chip esp32s3 --port <COM PORT> erase_flash To flash firmware to ESP32-S3: esptool.py --chip esp32s3 --port <COM PORT> write_flash -z 0x0 <firmware.bin> Optionally, you can check the chip ID and flash: esptool.py --chip auto --port <COM PORT> chip_id esptool.py --chip auto --port <COM PORT> flash_id To flash firmware to Seeed Studio XIAO ESP32C3 : Download CircuittPython firmware for Seeed Studio XIAO ESP32C3 . Conn

Install esptool on Windows 11

Image
esptool is a Python-based, open-source, platform-independent utility to communicate with the ROM bootloader in Espressif chips; such ESP32, ESP32-C3, ESP32-S2, ESP32-S3... To install esptool, Python and pip is needed, read Install Python 3 and Thonny IDE 4 on Windows 11 . To install esptool: pip install esptool Once esptool is installed, you can update it with: pip install esptool --upgrade related: ~  Flash CircuitPython firmware to ESP32-S3 using esptool on Windows 11 ~  Flash CircuitPython 9 (Alpha 5) on ESP32-C6, and control on-board RGB LED (NeoPixel) .

Install Silicon Labs CP210x USB to UART Bridge driver on Windows 11

Image
CP210x USB can be downloaded from Silicon Labs official websit. - Visit https://www.silabs.com/developers/usb-to-uart-bridge-vcp-drivers - click on DOWNLOADS tab. - download CP210x Universal Windows Driver.

Comprehensive Rust - a Rust course developed by the Android team

Image
Comprehensive Rust - This is a four day Rust course developed by the Android team. The course covers the full spectrum of Rust, from basic syntax to advanced topics like generics and error handling. It also includes Android-specific content on the last day. The source code of the course is HERE .

RP2040/CircuitPython 8.1.0 Beta 1, play animated GIF on 8 bit parallel bus ILI9341.

Image
My previous post show setup libraries, connection and exercises code on RP2040/CircuitPython to display on ILI9341 (8bit parallel bus) display . The old post show exercise  playing animated GIF in CircuitPython 8.1.0 Beta 0, run on ESP32-S3, display on ST7789 SPI TFT . Here is exercise run on WeAct RP2040 (16MB Flash)/CircuitPython 8.1.0 Beta 1, play animated GIFs on 2.8 inch 320x240  8 bit parallel ILI9341 TFT. gifio.OnDiskGif() is used to create an OnDiskGif object to display animated GIF, it's supported since CircuitPython 8.1.0 Beta 0. So, make sure it's flashed with CircuitPython 8.1.0 Beta 0 or higher. cpyPico_ParallelBus_ili9341_aniGIF.py """ Run on WeAct RP2040 (16MB Flash)/CircuitPython 8.1.0-beta.1 display on 8 bit ILI9341, play animated GIFs using gifio.OnDiskGif() """ import os, sys import time import board import displayio import adafruit_ili9341 import gifio displayio.release_displays() """

Resize animated GIF using GIMP, on Windows 11.

Image
This video show steps to convert animated GIF from 854x486 to 320x180. Open animated GIF in GIMP > Image > Scale Image... Select target image size > Scale > File > Export As... Name the new file > Export Make sure to select As animation > Export Done

ILI9341 (8bit parallel bus) display on RP2040/CircuitPython

Image
This video show  WeAct RP2040 (16M Flash) running CircuitPython 8.0.5, to display on  2.8 inch 320x240 ili9341 TFT with 8/16BIT parallel interface . It should be work on Raspberry Pi Pico also. This display is set 16-bit parallel interface by default. Read here to set it in 8 bit interface.      Connection between RP2040 and      2.8" 320x240 ili9341 TFT in 8-bit parallel interface: RP2040 GPIO      |           |      V V +------------+ | CLK T_CS | | F_CS PEN | | MOSI MISO | | NC GND | GND      GND | GND VDD | 3V3      3V3 | VDD BL | 3V3 | SDCS DB15 | 17      16 | DB14 DB13 | 15      14 | DB12 DB11 | 13      12      | DB10 DB9 | 11      10 | DB8 DB7 | | DB6 DB5 | | DB4 DB3 | | DB2 DB1 | | DB0 RST | 20           8      | RD WR | 19      9 | RS CS | 18 +------------+           ILI9341 TFT (parallel i/f) Exercise code cpyPico_ParallelBus_ili9341.py